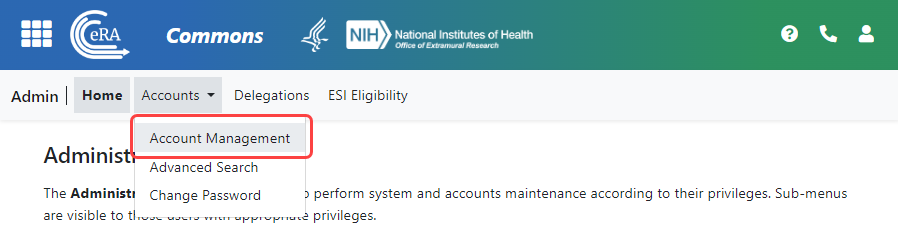
Create or Edit a Commons Account
Only an organization's eRA Commons administrators can create an account. Individual principal investigators or other eRA users cannot create their own account. If you need a new account or need account assistance with passwords, contact an SO from your organization; see Finding Signing Officials if You Don't Have an eRA Commons Account or Can't Login?.
You can edit eRA Commons accounts, or create new ones (such as for a PD/PI), using the Admin/Account Management module if you have one of the following eRA Commons roles:
- SO (signing official). Can create accounts of any role type except IAR, including creating additional SO accounts. See Signing Official (SO).
- AO (administrative official). Can create all accounts except SO, BO, FCOI accounts, and IAR accounts.
- AA (account administrator). Can create all Commons accounts except SO, FCOI accounts, and IAR accounts.
- BO (business official). Can create all accounts except SO, BO, FCOI accounts, and IAR accounts.
If you have one or the roles above, find more information about creating eRA Commons accounts via invitation, appointment, or institutional registration under additional links below.
The basic steps for creating an account for a new staff member at your organization are:
-
First search for the new person's account across all organizations to make sure the person does not yet have an eRA account. When you clear the Search only within my organization checkbox, a search in Admin searches users from all organizations.
-
If an existing eRA account cannot be found, click Create New Account and fill out contact info and assign roles to make a new account; see Creating a New User Account.
-
If the person does exist, and they have a PI or other scientific role (example: trainee), you should affiliate the person to your organization instead of creating a new account. PI and other scientific roles are intended to be used throughout the investigator's career regardless of their current institutional affiliation(s); see Editing an Existing eRA User Account.
Administering Accounts (Editing Roles, Affiliating Users, Helping Users with Login)
eRA users with administrative roles (listed in previous section) can do the following in Admin.
-
Edit a user's assigned roles. For instance, you might want to change an AA or PD/PI account to a SO account in the case of a promotion to other duties. Some roles conflict; for instance, a PD/PI, which is a scientific role, cannot co-exist with an SO role, which is administrative, so you might have to delete some roles to add others.
-
Affiliate a non-administrative user (such as a PI) to your own organization. Suppose a PI at another organization is going to work on one of your institute's awards, or suppose the PI is moving from another organization to your organization. In either case, you can use Admin to associate the existing PI account to your organization.
-
Help a user from your organization who is having trouble logging in with eRA credentials. You can reset the user's password or change the user's email (where password reset emails go). The eRA credentials are different from Login.gov credentials; for Login.gov help, see Detailed Login.gov Steps and Troubleshooting.
Searching for an eRA Account
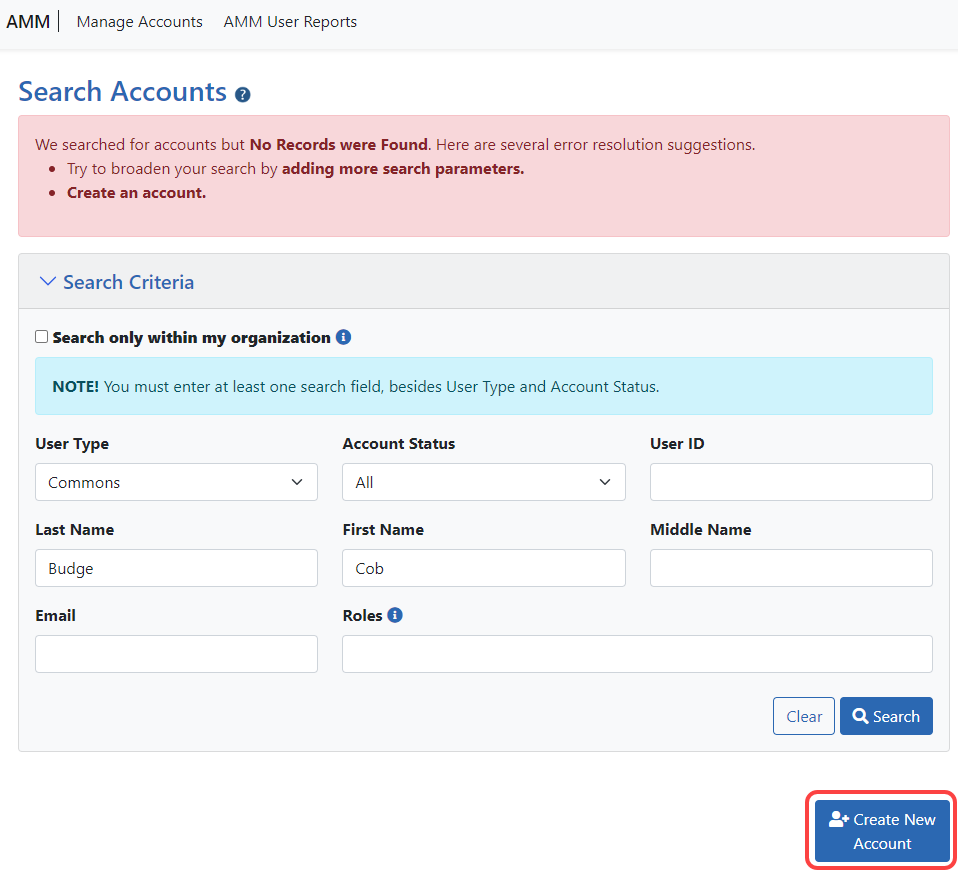
The ![]() Search Accounts screen opens. You'll notice that there is no Create New Account button displayed at this time. You cannot create a new account until you perform a search for the account first. This measure is in place to help avoid the creation of duplicate accounts.
Search Accounts screen opens. You'll notice that there is no Create New Account button displayed at this time. You cannot create a new account until you perform a search for the account first. This measure is in place to help avoid the creation of duplicate accounts.

-
Enter search criteria, such as the person's (Last Name, First Name), for the person you are seeking.
Search even if you plan to make a new account, to ensure the person does not already have an account. By default, the Search only within my organization checkbox is not marked, which means you are searching ALL eRA Commons accounts for all organizations.
TIP: Use the percent character, %, as a wildcard.
If accounts appear in the Search Results, you can:
-
Click the linked Name to see Funding Support, which also includes employment history, for the user. This can help you positively identify a user in the case of duplicate names found.
-
Click the Manage button to change affiliation, change roles, change the user's email (where their password reset emails go), or to reset their password (meaning they get a password reset email with a temporary password).
-
If you find the person you are looking to add to your organization, click Manage and use the Affiliate button to affiliate the person to your organization. You can affiliate only those with scientific (research-related) accounts (such as PI), not those with administrative accounts (such as SO).
-
Click Create New Account to create a new user (after searching to ensure the user does not already exist). After performing the search, the Create New Account button becomes enabled; see the next section.
Creating a New User Account
If you search for a person who is coming onboard to your organization, but you do not find the person, you can create a new account for the person.
- After you search for a person (see above section), click the
 Create New Account button.The Create Account screen displays. The User Type should default to Commons and the Primary Organization should default to that of your own. The User Type field can be changed if necessary.
 - On the Create Account screen, fill out the fields. Note that all fields except Middle Name are required.
- User Type: Select Commons from the drop-down list if it is not already displayed.
- User ID: Enter a unique name as the system user ID. Take care with entering this ID, as it is not changeable after account creation.
- Primary Organization: This field defaults to your organization and cannot be changed. If an individual needs to be affiliated with your organization and already has a non-administrative account with another organization (primarily Primary Investigators - PI), search for them outside of your organization and affiliate their existing account with your organization.
- Last Name
- First Name
- Middle Name
- Email. This email will be used for password resets (i.e. when the user clicks 'Forgot Password' on the eRA Commons login screen). It is very important to enter an email that the user will ALWAYS have access to, which might be their personal email.
- Confirm Email
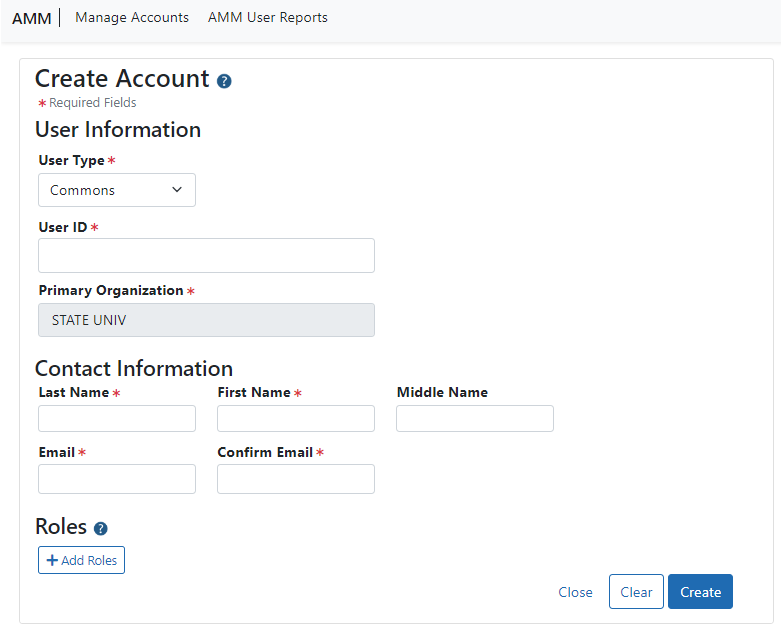
After entering contact information, you must assign a role to the account; if you do not add a role, you get an error when you try to save the new user.
- Click the + Add Roles button to open the AMM | Add Roles window.
The organization defaults to your organization and cannot be changed. A list of available roles appears. Note that more roles appear if you are an SO vs. other administrative roles. For instance, only an SO can assign a SO role to another user.click to view) - Select the role(s) for the new account.
Use Ctrl+click to select multiple roles. (Shift+click selects multiple contiguous roles.) Some roles conflict with one another and should not be assigned at the same time, such as PD/PI and SO, or any scientific role along with an administrative role. An error message will occur when you try to save the new user account if you assign conflicting roles.
")
- Click the Add Role(s) button in the Add Roles popup. The Create Account screen now lists the roles you selected. If you made a mistake, you can click the Remove button in the Action column to remove a role.

- Click the Create button to create the new account.
A success message appears at top and the read-only Account Details screen appears. Alternatively, if there were errors, errors are listed at top; see the next section.
If you need to change the account you just created, click the Manage button. When editing an account, you can no longer change the User ID or name. You can, however, edit the email, roles, affiliation, or reset the password. See Editing an Existing eRA User Account below.
The new account holder will get two emails at the email you specified; one contains a temporary password and the other contains the user ID.
The person for whom the account was created can edit all their personal and contact information using Personal Profile after they log in to Commons.
Possible Errors When Creating an Account
![]() A variety of errors might appear when you click Create to save a new account. A red bar appears at the top listing errors.
A variety of errors might appear when you click Create to save a new account. A red bar appears at the top listing errors.

Figure 1: Possible errors you might receive after clicking Create to create a new account
Editing an Existing eRA User Account
Steps for an SO or account administrator to edit existing accounts:
-
Search for existing accounts as described in Searching for an eRA Account.
-
On the account you want to edit, click the Manage button.

The Manage Account screen opens.

-
To edit roles, click the Add Roles button.
Be sure to add ONLY scientific (PI, POSTDOC, etc) OR administrative (SO, AA, etc) to an account, but not both, as they are incompatible. -
To change the account holder's email, enter the new email in the Email fields.
If the user then clicks 'Forgot Password,' the password reset email will go to this email address. -
To affiliate the user with your organization, click Affiliate.
The Affiliate button appears ONLY if the user you are viewing is NOT currently affiliated with your organization. If the user IS currently affiliated, then an 'Unaffiliate' button appears instead. Use Unaffiliate to remove a user from your organization if they have changed institutions and no longer work at yours. -
To reset a user's password (available ONLY for users within your organization), click the Reset Password button.
This triggers a password reset email to be sent to the email address in the Email fields.
