Create Commons Account
If you are a Commons user with an SO, AA, or BO role, you have the ability to create new Commons user accounts (such as for a PD/PI).
IMPORTANT: PD/PIs cannot create their own accounts: Only an SO or AA Commons user can create this account.
- To create a new user account, first search AMM to make sure the user doesn't already have an account. For instructions, see
- You launch the create-account process from the Search Results screen.
In the search results, profiles that are not already associated to a user account display an option to Create Commons Account Using Profile.
Select this option to create a user account for that profile.
Or click the Create New Account button located below the search results:

- When you select Create Commons Account, the Create Commons Account screen opens.
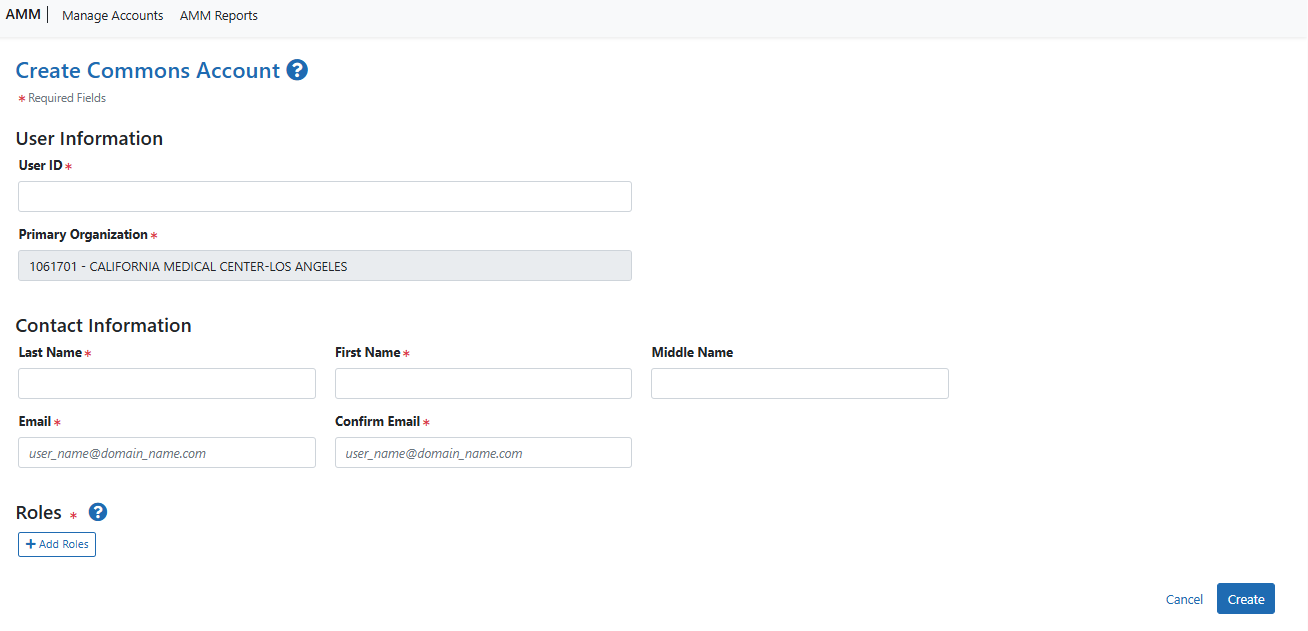
Create Commons Account screen for creating a Commons account
Perform the following steps to create an account:
- Enter the User ID or let the system generate one.
- The User ID length should be between six and 30 characters and should NOT contain special characters except the @ sign, hyphen, period, and underscore.
- The system can display the following messages: This User ID is available OR This User ID is already taken, please use another one.
- Usually, the Primary Organization defaults to the logged-in user's organization.
- If there is no user organization name selected, select the organization from the dropdown
 to assign a Primary Organization.
- If there is no user organization name selected, select the organization from the dropdown
- Perform one of the following options:
- When the account information is complete, click Create to create the account or click Clear to clear all information from the form.
When you click Create, the system displays the Account Details screen with a success message.
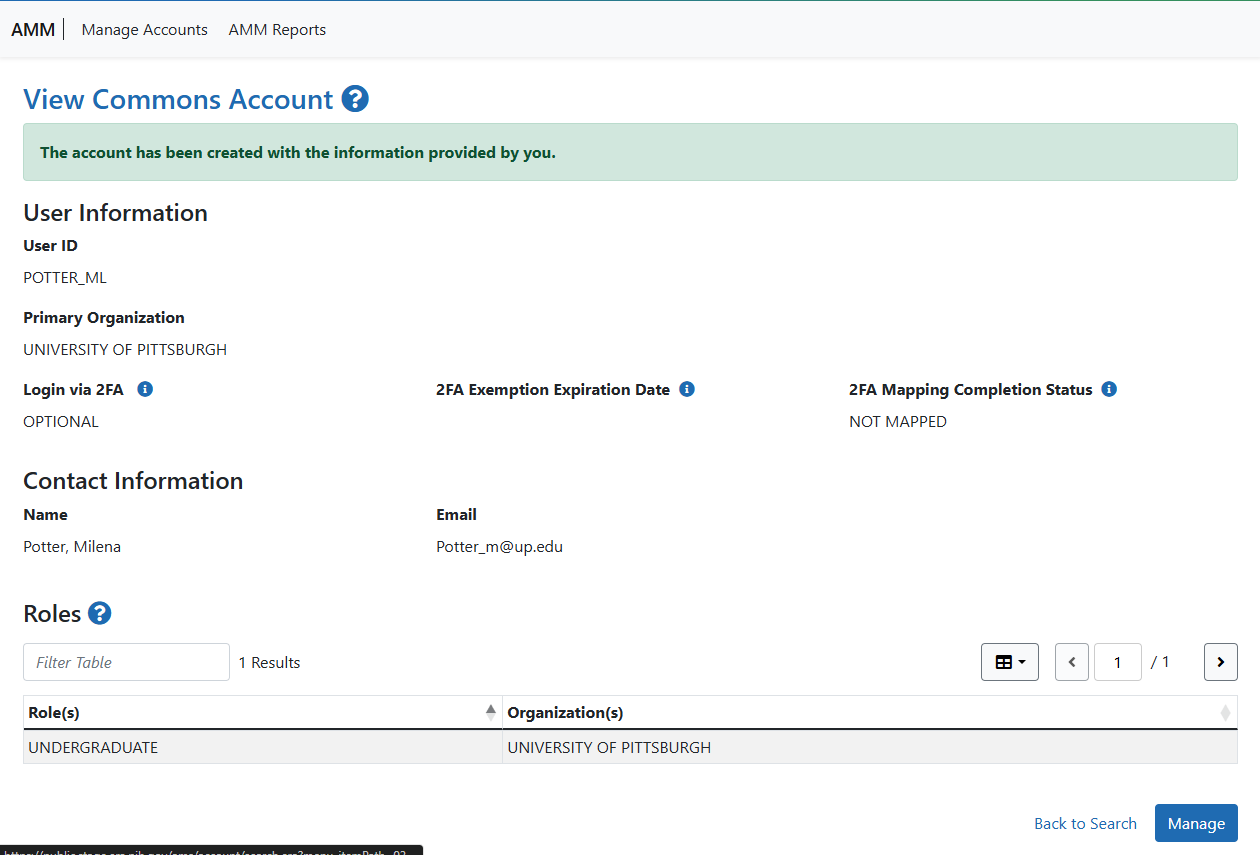
Account Details screen with account creation success notification
- Perform one of the following options on the Account Details screen:
- To return to the Search Accounts screen displaying the previous search results, click the Go Back hyperlink.
- To edit the account's information, click the Manage button.
- For more information, please refer to the Manage Account for Commons Users topic.
- To return to the Search Accounts screen to enter new search criteria, click the Back to Search button.
Account Invitations from eRA Systems
Create-account requests for eRA accounts that are validated by invitations from eRA modules can be approved or rejected automatically:
- If the identifying information the new user submits unambiguously matches the profile created by the account requester and the profile is not already associated to another user account, the request is approved automatically.
- If the identifying information is incorrect or an account already exists for the user profile, or if a comment has been entered in the user's funding and committee service history, request is denied and the system sends notifications to the account requester and to the eRA Service Desk.
Examples of system-generated account invitations:
- SO creates a new PI account in AMM
The new PI receives a system-generated invitation to login to eRA Commons and validate the account.
- SRO enables a new reviewer in Internet Assisted Review (IAR)
The reviewer receives a system-generated invitation to login to eRA Commons and create an account to access IAR. See the IAR Online Help for information on enabling reviewers
- PD/PI appoints a new trainee in xTrain
The trainee receives a system-generated invitation to login to eRA Commons and create an account to access xTrain. See xTrain Online Help for information on appointing trainees.
Workflow
The account invitation procedure includes these steps:
- The account requester creates the new account.
- The new user receives an email notification that includes the username and other details about the new account.
- The user receives a second email that includes a temporary password for the new account and instructions for logging into the system. This email explains that that the user must login to the system that day or the account will be locked. After an account is locked, any attempt to log in will be redirected to the password reset/lost password workflow.
- The user logs in with the provided credentials and is immediately instructed to create a new password for the account.
NOTE: If the user enters incorrect login information too many times, the account is locked and the user must contact the eRA Service Desk to complete the login process.
