Editing the RPPR Forms
Field-by-field guidance is available for completing the NIH, AHRQ, and VA Research Performance Progress Reports (RPPRs). Refer to the NIH and Other PHS Agency RPPR Instruction Guide (https://grants.nih.gov/sites/default/files/rppr_instruction_guide.pdf) for completing Sections A-I of the RPPR. This guide does not apply to Department of Commerce (DOC) awards.
NOTE: PDF uploads for all RPPR sections are required to be a flattened PDF. A flattened PDF is one that does not have fillable forms or other layers, such as movable images. The easiest way to flatten a PDF using Adobe Acrobat Reader is to print the document, but choose the “Print to PDF” option in the Print dialog, and save to a new file name when prompted. If you attempt to upload and save a file that is not a flattened PDF, you see this error message, "Error Uploading PDF. Please ensure all files are flattened. ....".
See screenshots of each form at the links below. Not all forms apply to all awards and specific questions on each form may be applicable or not depending on the award type and the awarding agency's policies.
Editing the RPPR
To edit the RPPR:
- Update the information as necessary and click the Save button.
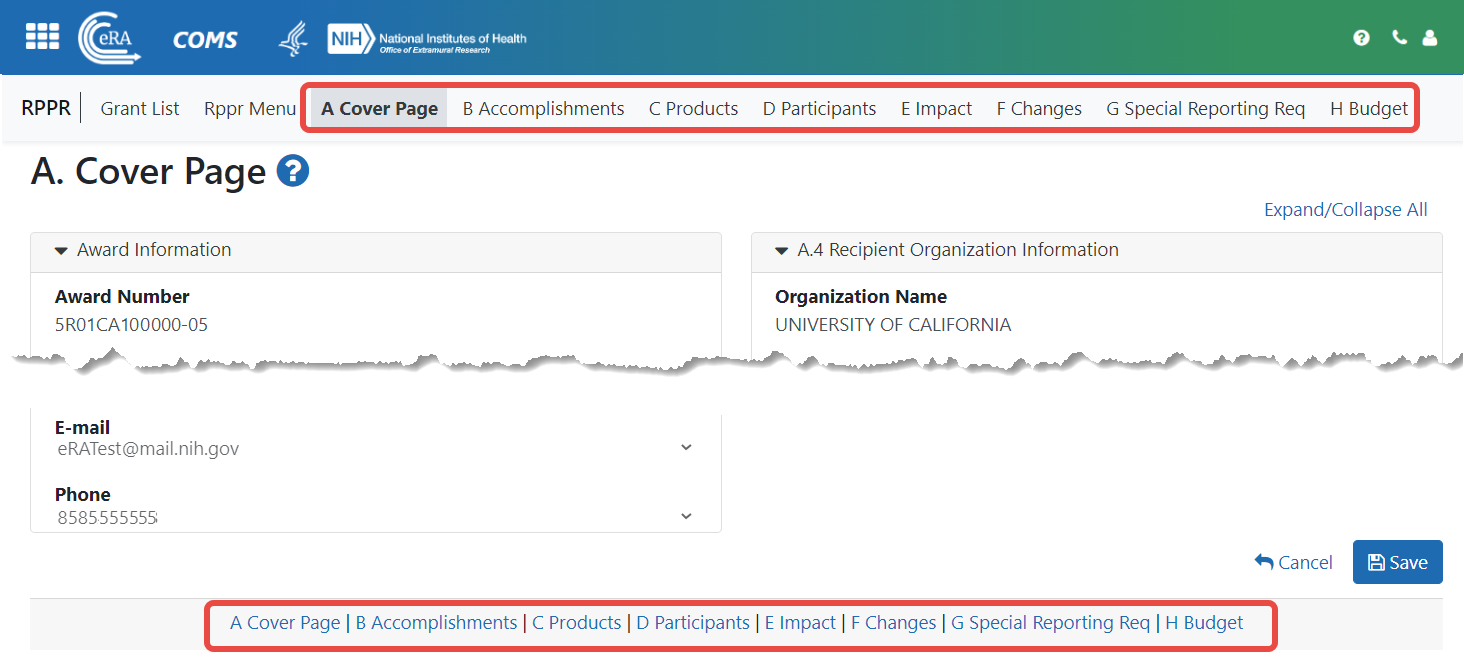
The
 RPPR includes tabs at the top and links at the bottom of the page for navigating to the other sections (e.g., Accomplishments, Participants), which may be completed in any order. Before navigating to and from any of these sections, you must click the Save button--navigating away from any page on the RPPR without clicking Save results in the loss of any information entered prior to the last save.
 - Sections can be completed in any order. To navigate and populate the other sections of the RPPR, select the links from the top or bottom of the page.
- Complete the appropriate fields of the report.
Details for completing each section are discussed in the RPPR Instruction Guide (https://grants.nih.gov/grants/rppr/rppr_instruction_guide.pdf). Many of the fields on these pages, however, behave in a similar manner.
-
Click the Save button before navigating to the next page.
-
To return to the RPPR Menu, click the Cancel button.
When an RPPR is ready for review and submission, it is routed to the next reviewer. Refer to Routing the RPPR
Using the Buttons, Tables, and other Web Page Items to Fill Out RPPR Forms
+ Add Button
To use an Add button, click it to see a popup, then enter or select data into the appropriate fields.
You can edit or delete items from the table using the actions listed under the three-dot ellipsis menu.
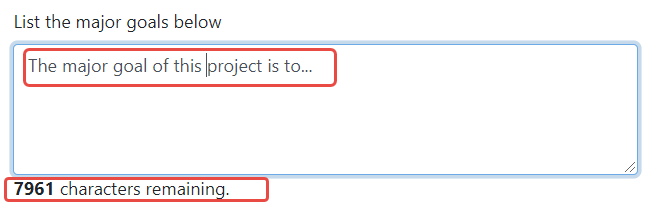
Text Box
All text boxes on the RPPR have character limits. The number of characters available is reflected beneath each text box as characters are entered.
Changing Saved Responses
While in work-in-progress (WIP) status, the RPPR is editable. A warning message displays as follows:
The entered/uploaded response will be deleted. Do you wish to continue?
The user editing the information can choose to Continue or Cancel the action. Choosing Continue deletes the previous response, removes any attachments, and disables the relevant fields associated with the question. Choosing Cancel cancels the change.
Using Table Tools
You might notice various icons above tables in RPPR. Several built-in table tools let you work with data in tables.
In tables, you can filter, show and hide columns, download/print data, choose display options, and more. For information on table tools below, see Standard Tools for Tables.

NOTE: The number and order of appearance of the tools may differ between tables and modules.
Filter

Entering filter text to see instant filtering of the list as you type, with the number of found results updated as you type. The text you type in filter is highlighted in the table.
Sorting Columns

Click column headers to sort by that column. Gray up and down triangles indicated a non-sorted column. A solid black up arrow indicates the table is sorted by that column-descending and solid black down arrow indicates the table is sorted by that column ascending.
Bulk Select/Deselect Tool

Use the bulk actions tool to select or deselect all items in a table, or to select all/deselect all of those items currently visible on the page. , and to show selected rows only or all rows. Other bulk action tools might also let you mark or clear the checkboxes of all currently visible rows (such as those found by typing filter text).
Check All marks all checkboxes regardless of the number of pages of records shown. In other words, if there are 10 pages of records available, with only the first page currently visible, Check All marks all enabled checkboxes on all pages. By contrast, Check All Visible marks only those enabled checkboxes on the currently visible page. See Page Navigation below for directions on how to navigate between pages of data.
Download/Print Tool

Use the download tool to export table data to Excel or PDF, or to print. Data from all columns is exported/printed even if only a subset of columns are visible.
Grid Tool

To help avoid scrolling, use the grid tool to specify how many table rows appear per page.
Search Results Navigation

Navigate to each page of search results using the above tool.
