Planned Enrollment Report for Other Components
For assistance with the information required on this form, please refer to the appropriate application guide on the How to Apply page.
The Planned Enrollment Report form must be added to the application or to the component of a multi-project application as an optional form. Refer to the help topic titled Add Optional Forms .
For guidance on completing the form in ASSIST, refer to the steps below.
Adding a Planned Enrollment Study
To add a planned enrollment study:
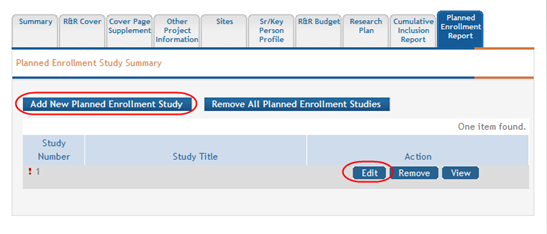
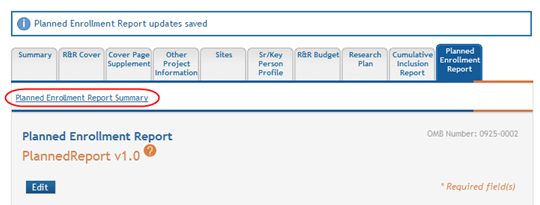
 Select the Add New Planned Enrollment Study button. If this is the first study you are adding, you can also select the Edit button for Study 1 located in the Action column of the displayed table.The Planned Enrollment Report opens for editing.
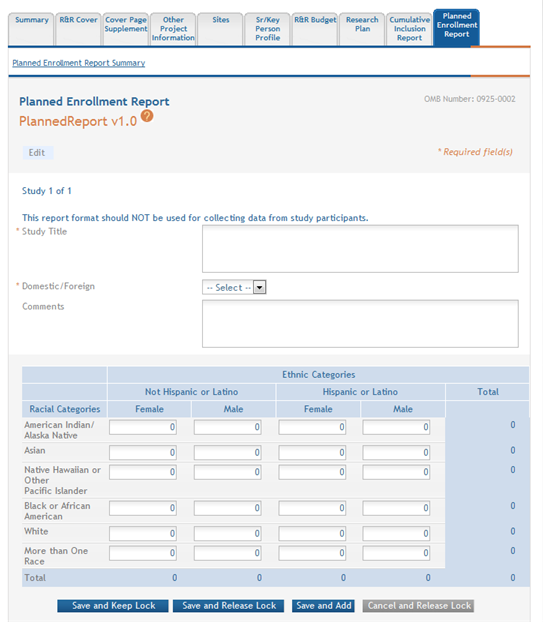
- Complete the required fields and any other appropriate information. Required fields are marked with an asterisk (*).
- Select one of the save options at the bottom of the form to save the data:
- To save the information and keep the form open for further editing, select the Save and Keep Lock options.
- To save the information and close the form, select the Save and Release Lock button.
- To save the data on the current page of the form and to display a new page for entry, select the Save and Add button.
- Select the Planned Enrollment Report Summary link to return to the table of enrollment studies.
NOTE: Selecting the Cancel and Release Lock button - followed by the Continue button on the confirmation - returns the form to read-only and does not save any of the entered information onto the form.
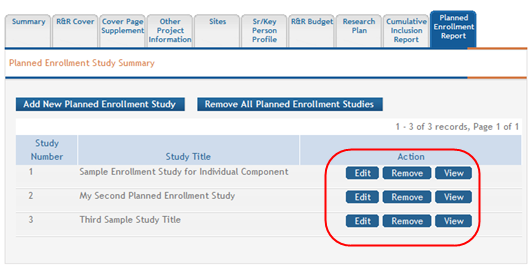
Viewing and Editing the Enrollment Studies
To view and/or edit a planned enrollment study:
- Select the appropriate button for the specific study to be viewed or edited:
To view the information:
- Select the View button to see the form in read-only.
- Note that once within the read-only form, you can select the Edit button at the top of the form to enter edit mode.
To edit the information:
- Select the Edit button for the study.
- Make your changes.
- Select one of the save options at the bottom of the form to save the data:
- To save the information and keep the form open for further editing, select the Save and Keep Lock options.
- To save the information and close the form, select the Save and Release Lock button.
- To save the data on the current page of the form and to display a new page for entry, select the Save and Add button.
NOTE: Selecting the Cancel and Release Lock button - followed by the Continue button on the confirmation - returns the form to read-only and does not save any of the entered information onto the form.
- Select the Planned Enrollment Report Summary link to return to the table of enrollment studies.
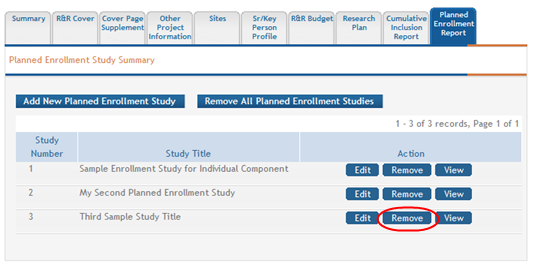
Removing Individual Planned Enrollment Study
You can remove the studies individually using the buttons found in the Action column of the summary table. To remove an individual study:
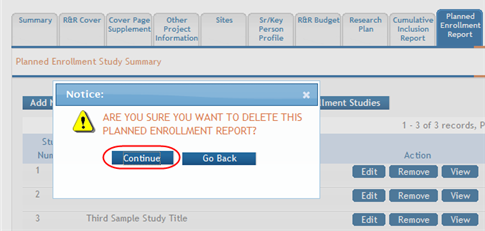
- Select the Remove button for the specific study.
A confirmation message pops up prompting you to continue or cancel this action.
- Select the Continue button to continue removing the study.
If you wish to cancel, select the Go Back button.
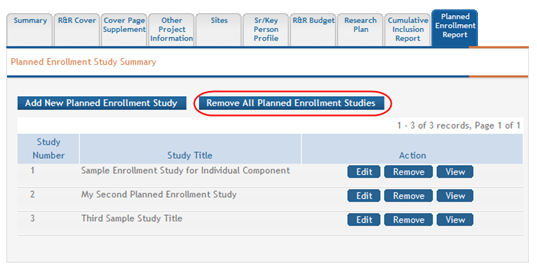
Removing All Planned Enrollment Studies
You can remove all studies at the same time rather than removing each individual study. Removing all studies also removes the entire form from the component.
To remove all studies:
- Select the Remove All Planned Enrollment Studies button at the top of the form.
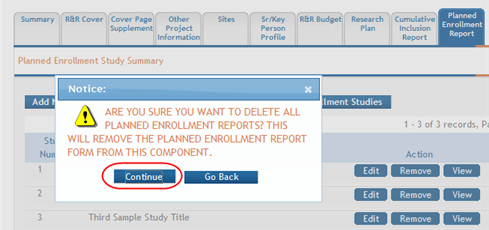
A confirmation message pops up prompting you to continue or cancel the action.
- Select the Continue button to remove all forms.
If you wish to cancel, select the Go Back button.