Adding a Critique Template
NOTE: This section applies to Microsoft Word-based critique templates only. For information about online critiques, see About Online Critiques.
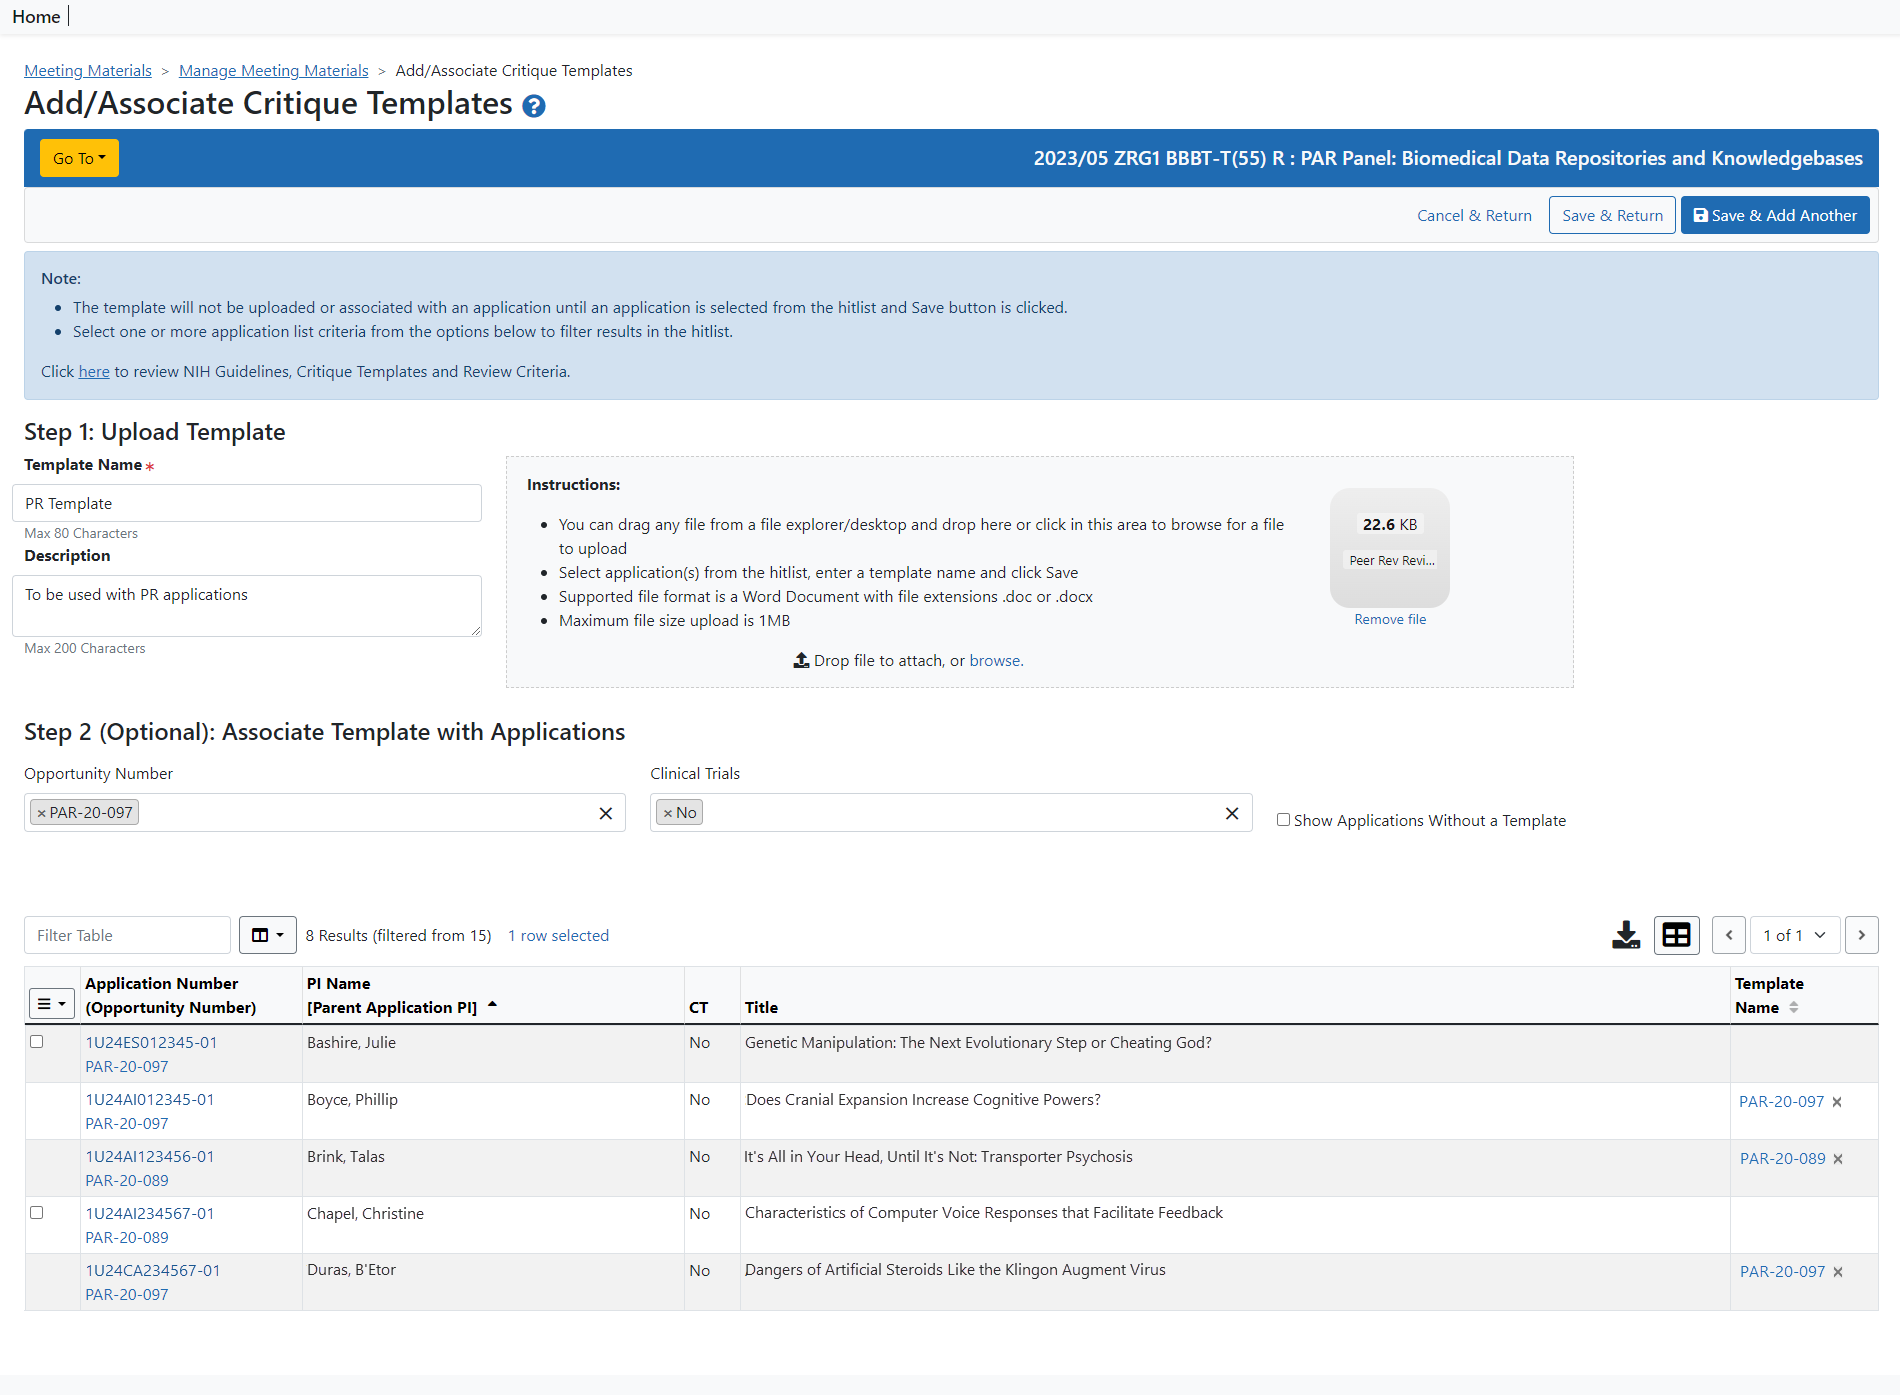
You add critique Templates and associate them with applications on the Manage Materials screen in IAR. Click the Add/Associate Critique Templates button to begin. ![]() click to see screenshot)
click to see screenshot)
This opens the Add/Associate Critique Templates screen used to upload the templates and then associate applications with templates. ![]() click to view screen)
click to view screen)
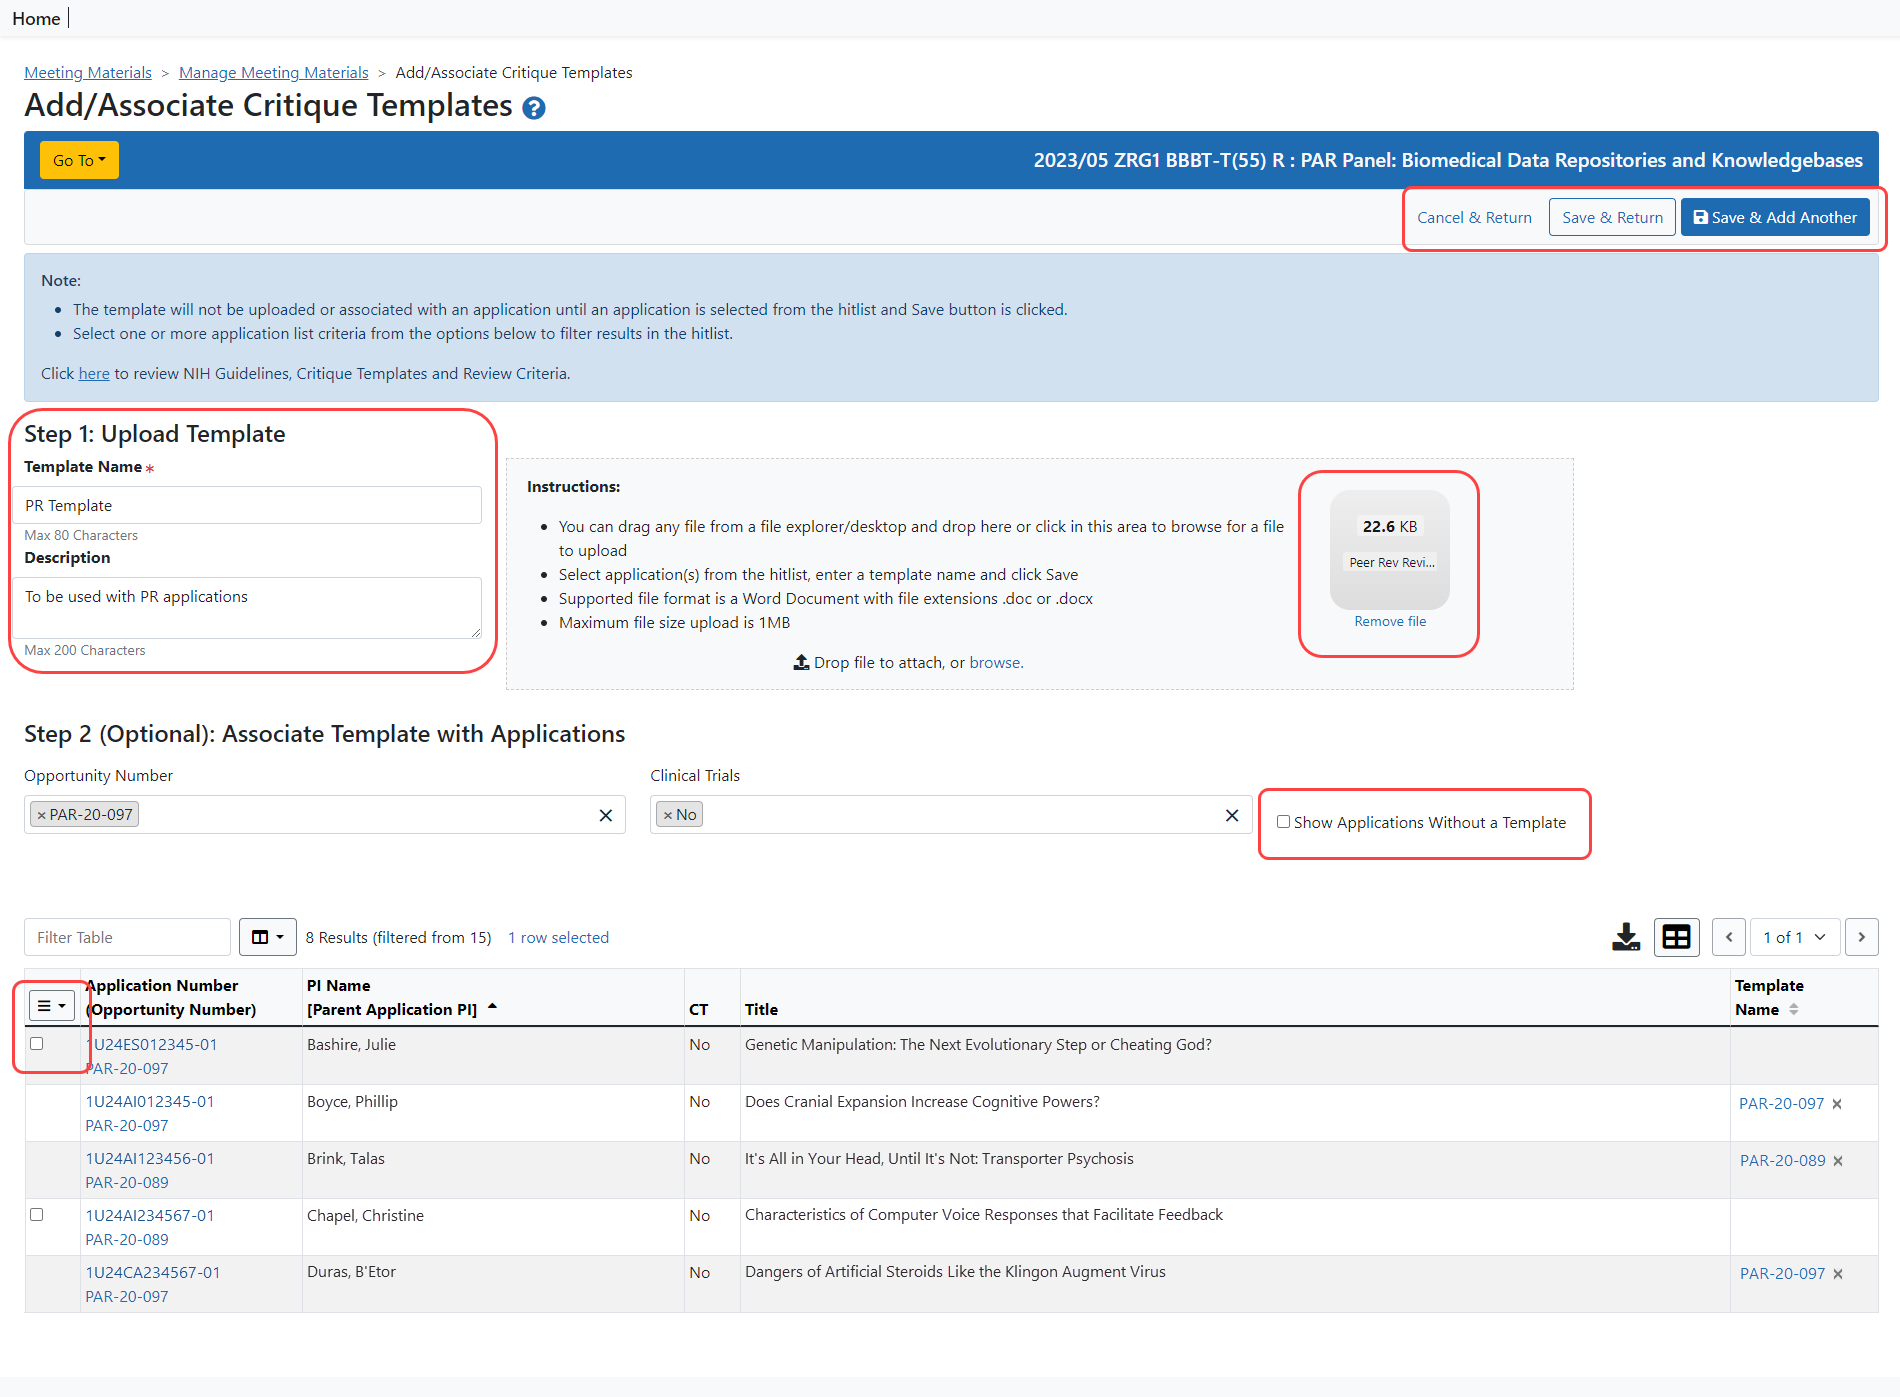
In the Step 1: Upload Templatesection, drag and drop a template into the Instructions: box or click into the Instructions: box and browse to and select the template. The selected template will be displayed in the Instructions section as an icon.
Enter a name and description for the template. The name does not have to match the original template description or file name.
Select the applications to associate with the template by clicking the checkbox(es) next to the application(s) or, to select all listed applications, click the Bulk Action button in the header of the selection column.
The applications may be sorted using the sort icons in the Template Name column. Additionally, to show only the applications that do not have an associated template, click the checkbox next to “Show applications without a template” above the application hit list.” ![]() click to view screen that is ready to save)
click to view screen that is ready to save)
Select one of three buttons below the Description field.
- The Save & Add Another button will save the template name and description and link the template with the checked application(s) and keep the Add/Associate Critiques Template screen open so another template can be added.
- The Save and Return button will perform the selected actions and return to the Meeting Materials screen.
- The Cancel and Return button will remove the selected template and application selection(s) and return to the Meeting Materials screen.
If a critique has already been submitted for an application in the meeting, you will get a pop-up message asking if you want to continue. Click Confirm to proceed or Cancel to go back. ![]() click to see message)
click to see message)
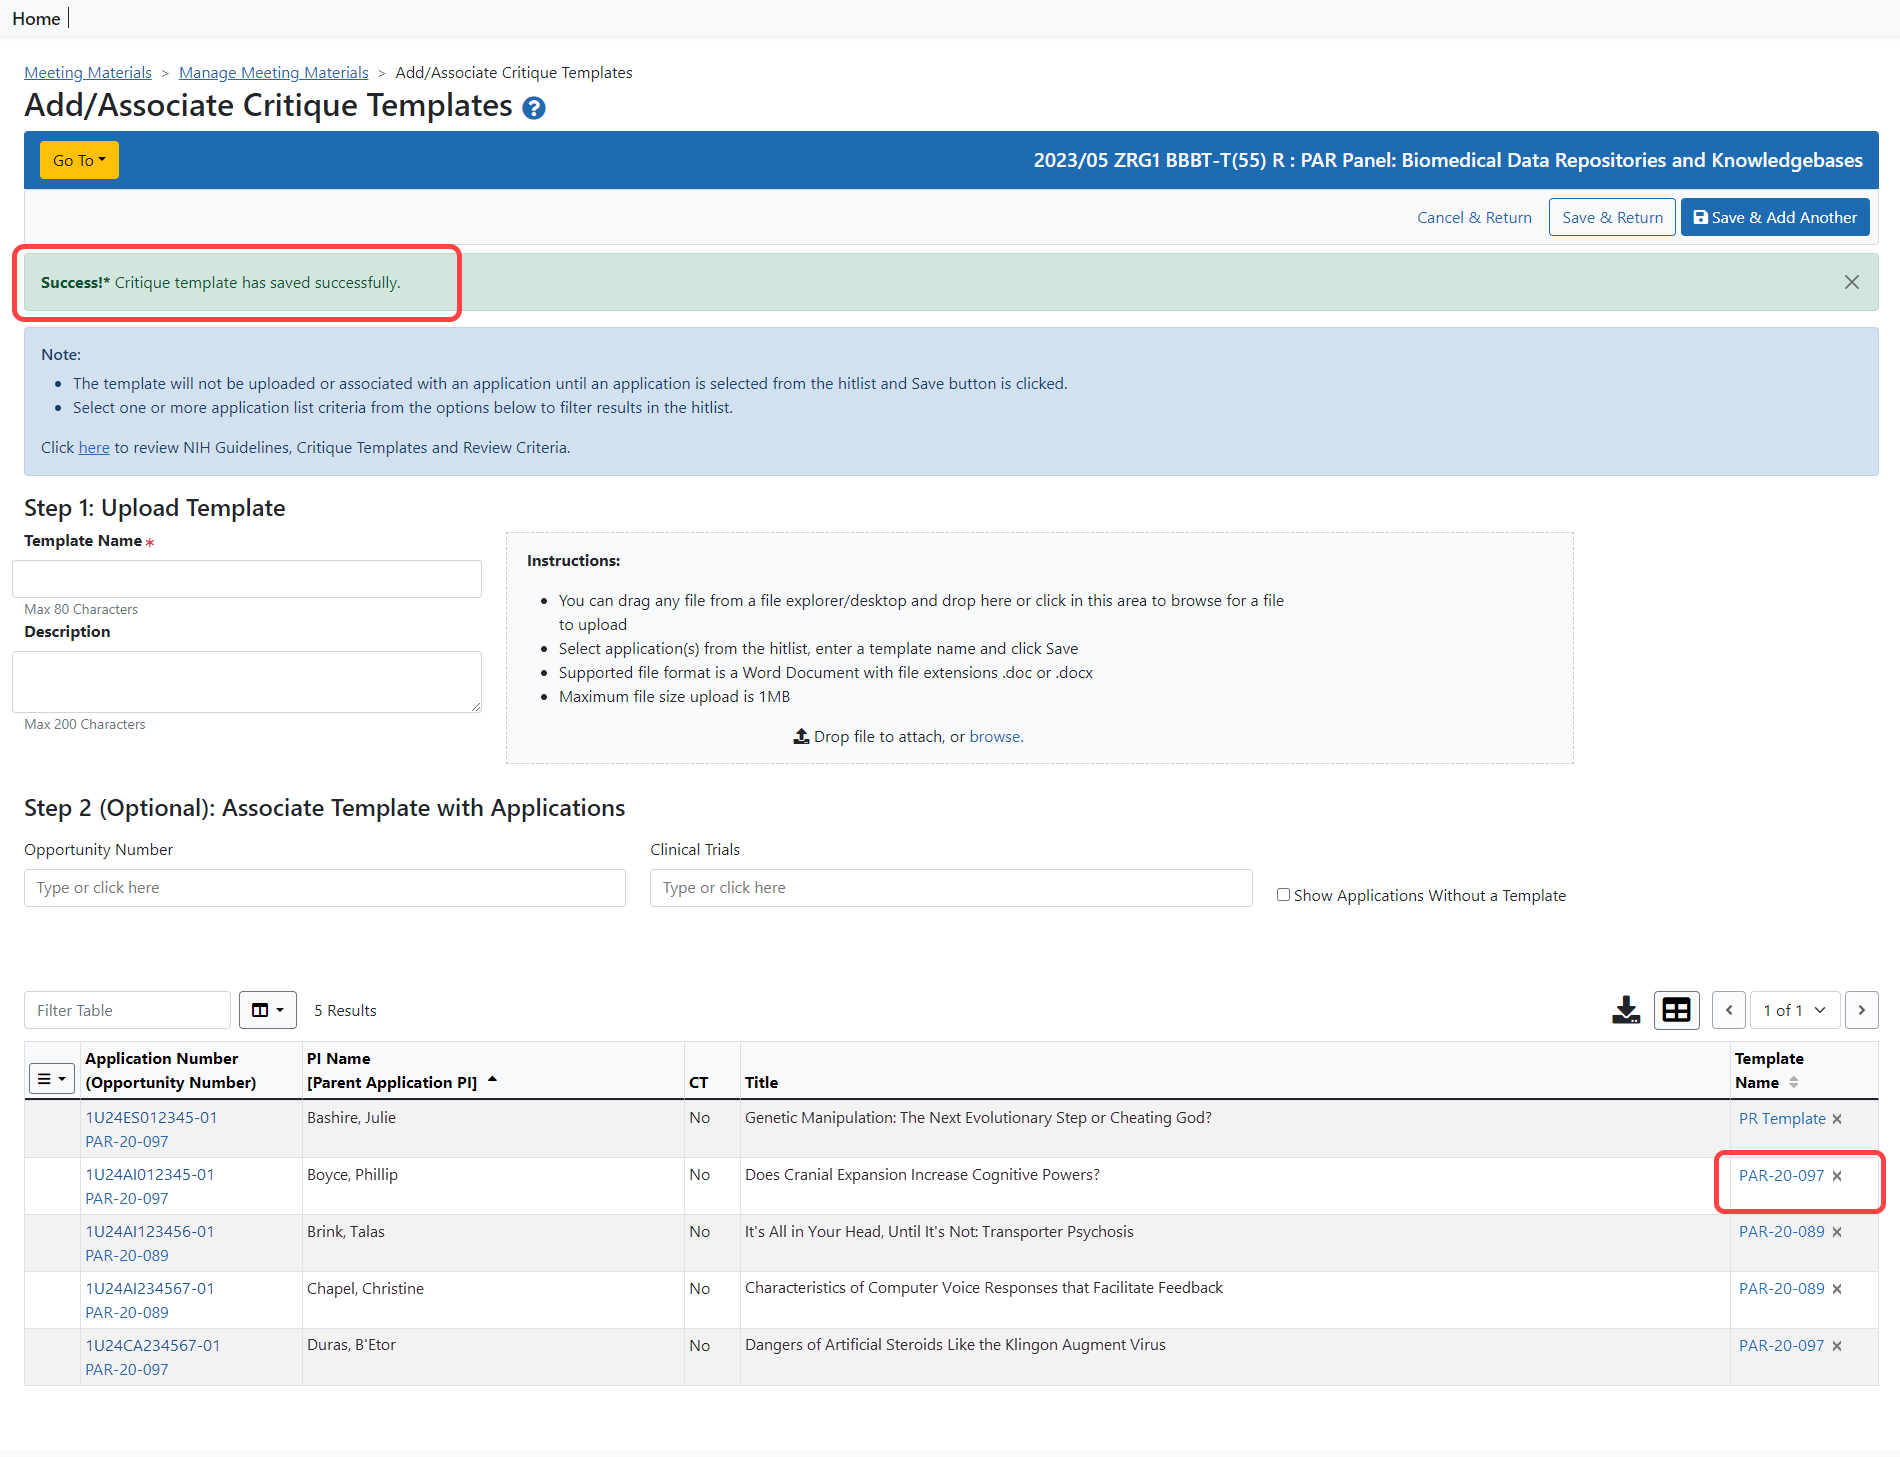
Your screen should now show a successful upload message above the Upload Document section. The uploaded template name will display as a hyperlink in the Template Name column. ![]() click to view an example screen)
click to view an example screen)
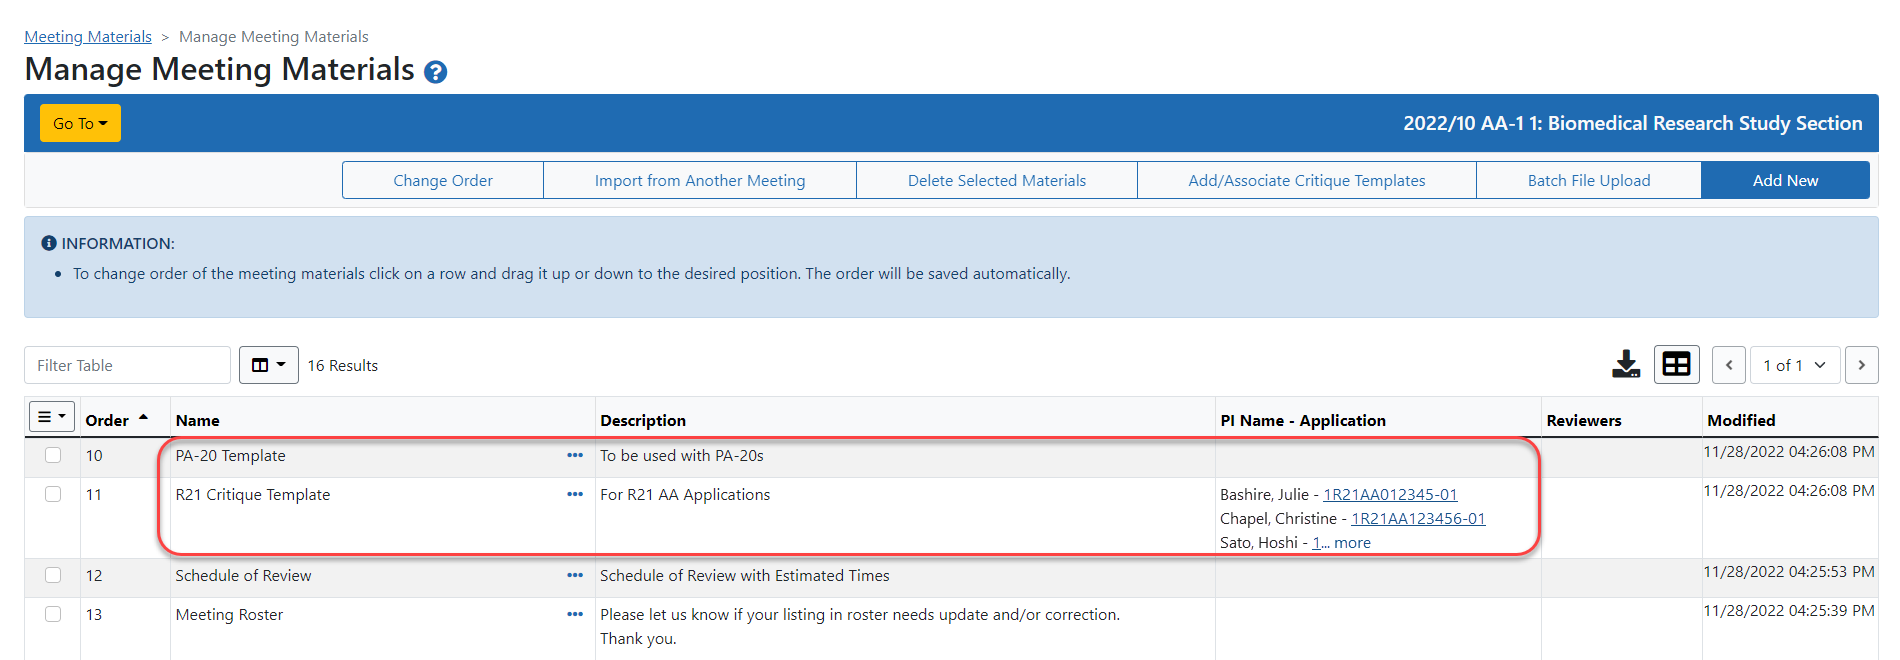
On the Manage Materials screen, the three-dot ellipses icon in the Name column will display the template, associated applications, and links to view the template file or to edit it.

If more than three applications have been associated with the template, the first three will be displayed in the PI Name - Application column. If more than three applications are associated, a More... link will be displayed. Click on the link to see the full list. ![]() click to view)
click to view)
NOTE: This critique template will appear to reviewers as a link titled "Critique Template" below the pertinent application on the List of Applications screen.
In tables, you can filter, show and hide columns, download/print data, choose display options, and more. For information on table tools below, see Standard Tools for Tables.

Figure 8: Table tool icons


