Just in Time (JIT) for VA Applicants
IMPORTANT: This topic pertains to the Just in Time (JIT) screen available to VA applicants. To see help for other JIT screens:
- JIT screen available to applicants of NIH and other agencies, see Just in Time (JIT) Screen.
- JIT screens available to VA agency staff, see Just in Time (JIT) Overview for VA Agency Staff.
The JIT (Just in Time) feature of eRA Commons lets you electronically submit additional grant application information after the completion of the peer review, and prior to funding. The program director/principal investigator (PD/PI) and the signing official (SO) work together to complete and submit requested information directly to the VA when that information is requested via email notification. JIT capabilities can not be delegated.
For more information, see Just-in-Time Process to Release Funds on the VA website.
NOTE:
• Either a PI or an SO can upload and save JIT information; however, only the SO can submit it to the VA.
• All JIT attachments should be submitted in flattened PDF format with a maximum size of 6MB. Each upload area can accept only a single PDF, and if you re-upload a file for a given JIT section, it replaces the previous file.
The JIT link is available in the Status module for applications that VA agency staff have prepared a JIT request for. See Accessing the JIT Screen. You will receive an email alerting you if your application is subject to a JIT request, whereupon you have 180 days to submit the requested material. You do not need to submit all the JIT material at once. You can submit files for each section independently of other sections.
Sample JIT Screen
The ![]() JIT screen for VA applicants (PI/SO) looks different depending on what categories of information that the VA agency staff has requested. You see only those categories and secondary sites that the agency staff configured for the JIT request.
JIT screen for VA applicants (PI/SO) looks different depending on what categories of information that the VA agency staff has requested. You see only those categories and secondary sites that the agency staff configured for the JIT request.

Note that while the SO has a Submit button at the bottom of the screen, the PI does not because only the SO can submit JIT data to the awarding agency. Standard award information appears at the top of the JIT screen in the Application Information section. The Total Submissions field indicates how many times any part of the JIT has been submitted.
Accessing the JIT Screen
NOTE: The JIT link is removed once an application has been awarded. You will receive an email alerting you if you need to respond to a JIT.
PIs: Access the JIT Screen by
-
In eRA Commons, navigate to the Status module.
-
Access the List of Applications/Awards.
-
Find the application for which you need to respond to a JIT, then click the JIT link in the Available Actions column.
SOs: Access to JIT Screen
See Just in Time (JIT) Search for SOs for steps on searching for a grant that is in the JIT process.
Responding to the JIT
Viewing Initial Agency Comments
To access initial agency comments, which might include reminders or instructions, hover over, or click, the Additional Agency Comments link in the section, shown below. Hovering shows the comments briefly, while clicking makes the comments stay visible until the link is clicked again:

Uploading Files to the JIT
For each section in the JIT, upload one or more flattened PDFs.
Upload button. Use the Upload button to find and choose a file on your drive. There can be one file uploaded per Upload button.
Drag and Drop. You can also drag and drop a file from a Windows directory overtop of the appropriate section on the JIT screen; however, if drag and drop is used for sections that allow two files to be uploaded (which contain two Upload buttons), both files will be replaced. ![]() Example of two-file section:
Example of two-file section:

File Format. All JIT attachments should be submitted in flattened PDF format with a maximum size of 6MB. Each Upload button can accept only a single PDF, and if you re-upload a file, it replaces the previous file.
NOTE: A flattened PDF is one that does not have fillable forms or other layers, such as movable images. The easiest way to flatten a PDF using Adobe Acrobat Reader is to print the document, but choose the “Print to PDF” option in the Print dialog, and save to a new file name when prompted. If you attempt to upload and save a file that is not a flattened PDF, you see this error message, "Error Uploading PDF. Please ensure all files are flattened. ....".
Removing a File
To remove a file, either click its Delete button, or simply upload another file. The newly uploaded file will always replace the existing file.
Viewing Contents of an Uploaded File
To view a file that has already been uploaded, click its name, which is linked, to view the PDF in a browser window.
Viewing History of Submissions
To view the history of a section's submission, click the section's History button to see a record of all submissions for the particular section. History includes file name, submit date, status, comment, and person who uploaded the file. Until a file for the section has been submitted, History is blank, as it only shows history of actual submissions, not uploads or saves.
Fields in a Section
Last Uploaded File Name. File name of file currently uploaded for the section.
Date Created. Date the file was uploaded (not creation date of file).
Number of Submissions. Number of times a file has been submitted for this section of the JIT. For example, if you see number of submissions set to 3 for the Revised Budget section, then 3 separate files have been submitted for the Revised Budget section, each file replacing the previous. Each section can have different number of submissions. This can be different from Total Submissions under Application Information, which indicates the total number of times an SO has clicked Submit for the JIT.
Comments. You cannot add comments when uploading, saving, or submitting. Agency staff can add comments during approval or rejection of submissions and those comments appear in this field.
Additional Agency Comments. Hover or click to see comments that were entered by agency staff when they configured this JIT.
Agency Review File Name. After submittal, agency staff can approve or reject a section. At that time, agency staff can upload a document as part of the approval/rejection; that file will then reside in the Agency Review File Name field. If you view the JIT after agency review, you can check that field for files the agency has provided.
Reviewing, Saving, or Submitting the JIT
Buttons for reviewing, saving, and submitting (only the SO sees the Submit button) are located at the bottom right of the JIT screen.

Reviewing
Before submitting, review the JIT contents. There are a few ways you can do this:
-
Click on the file names of uploaded files to see their contents in a browser window or PDF reader.
-
Check the badge status to make sure the sections you are submitting have a Uploaded badge to show status:
 . See Status Badges in the previous section.
-
Finally, you can click the View Just In Time Report button, outlined in purple above, which shows you a concatenated PDF that contains all uploaded files that will be submitted if you click the Submit button. This does not necessarily contain all files, only those slated to be submitted at this time. Other files may have been submitted previously, and those will not appear in the report.
Submitting
The SO can submit the JIT more than once. You do not need to submit all the JIT material at once. You can submit files for each section independently of other sections. For instance, maybe you have four out of five files prepared, but need some time to develop the last file. You can upload the four files and submit, and return later to the JIT to upload the last file and resubmit. You can also resubmit a file that you have already submitted; as long as the agency has not yet approved a particular section, you can continue to upload a file to a section and resubmit.
To submit all uploaded files, SOs click the Submit button at the bottom of the screen. In the Submit Confirmation popup, click Submit JIT Data to confirm.
Saving
If you are not ready to submit, you can save at any time and return to the JIT later to change it. Saving does not submit anything to the agency, but merely saves the JIT package for you or others to work on later. To save the JIT, click the Save button at the bottom of the screen.
Accessing the JIT Later
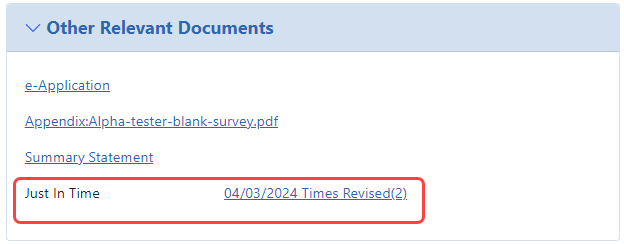
After you submit, you can go back to the JIT and make changes. Search for the grant again, and you will see the JIT link under the three-dot ellipsis menu again, with the number of times it has been submitted. Select the JIT link to revisit the JIT.

At this point, you can:
-
Upload files for any sections you omitted earlier
-
Replace a file that you previously uploaded by uploading a different file. The new file replaces the existing file.
Any additional or replaced files that you upload will be submitted when the SO clicks Submit.
NOTE: The JIT link is removed once an application has been awarded.
Viewing JIT Information on the Status Information Screen
Once submitted, the submitted JIT files are available to view from within the Status Information screen. Access the Status Information screen by selecting the application ID (displayed as a link) from any of the Status result screens. See Status Information.
NOTE: All versions of files you submitted are within the Just in Time report on the Status Information screen. For instance, if you submitted BudgetV1.pdf for the Budget section, then later replaced it with the updated BudgetV2.pdf, you will see both versions of the file in the report on the Status Information screen.